Backup Source Configuration
We’ll be configuring the set-up in our recommended management console, Backrest, which was installed in the previous section. For additional documentation not provided here, please review the Backrest documentation.
We’ll be configuring the set-up in our recommended management console, Backrest, which was installed in the previous section. For additional documentation not provided here, please review the Backrest documentation.
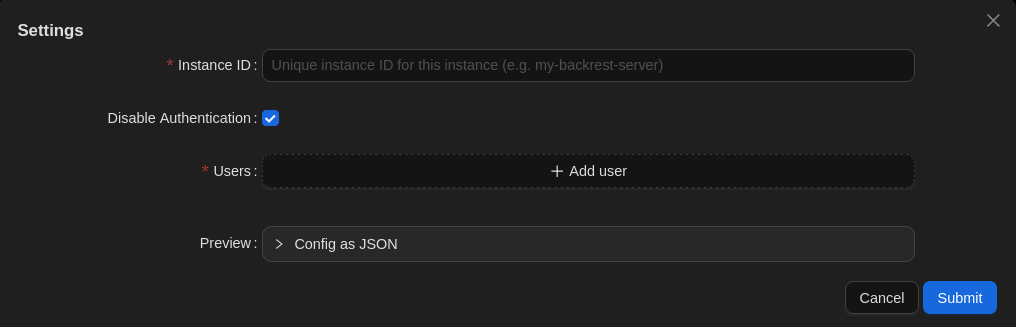
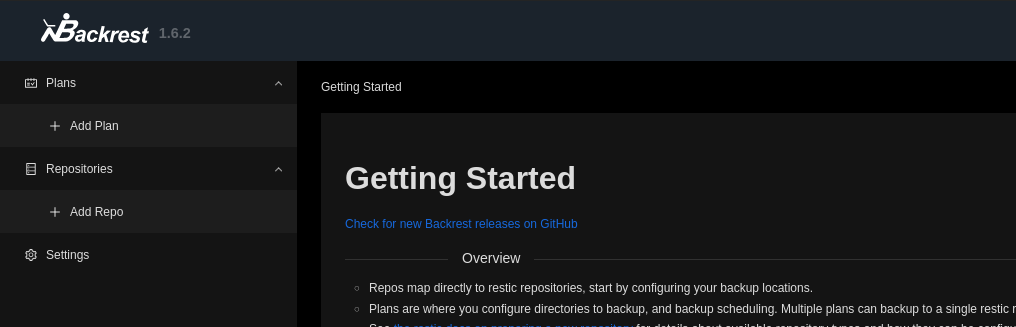
On the left sidebar, click on Repositories -> Add Repo.
Then, fill out the form. There’s an image of a filled form following the steps below.
europe is supported currently), your username for USER_NAME, and the ID you’d like for your repository for REPOSITORY_ID (but note the Caution below).
rclone:europe:backupscale/USER_NAME/REPOSITORY_IDRepository IDs must be between 3 and 63 characters (inclusive). They can contain lowercase letters, numbers and dashes (but not at the beginning or end).
RESTIC_PASSWORD_FILE=/etc/restic/password--option rclone.program="ssh USER_NAME@backups.backupscale.com rclone"--option rclone.args="serve restic --stdio --b2-hard-delete --drive-use-trash=false --verbose"--verboseRclone is the tool we use to marshal your encrypted files to and from our cloud storage service.
Enabling this could corrupt your backup repository. Leave it off unless you really know what you’re doing.
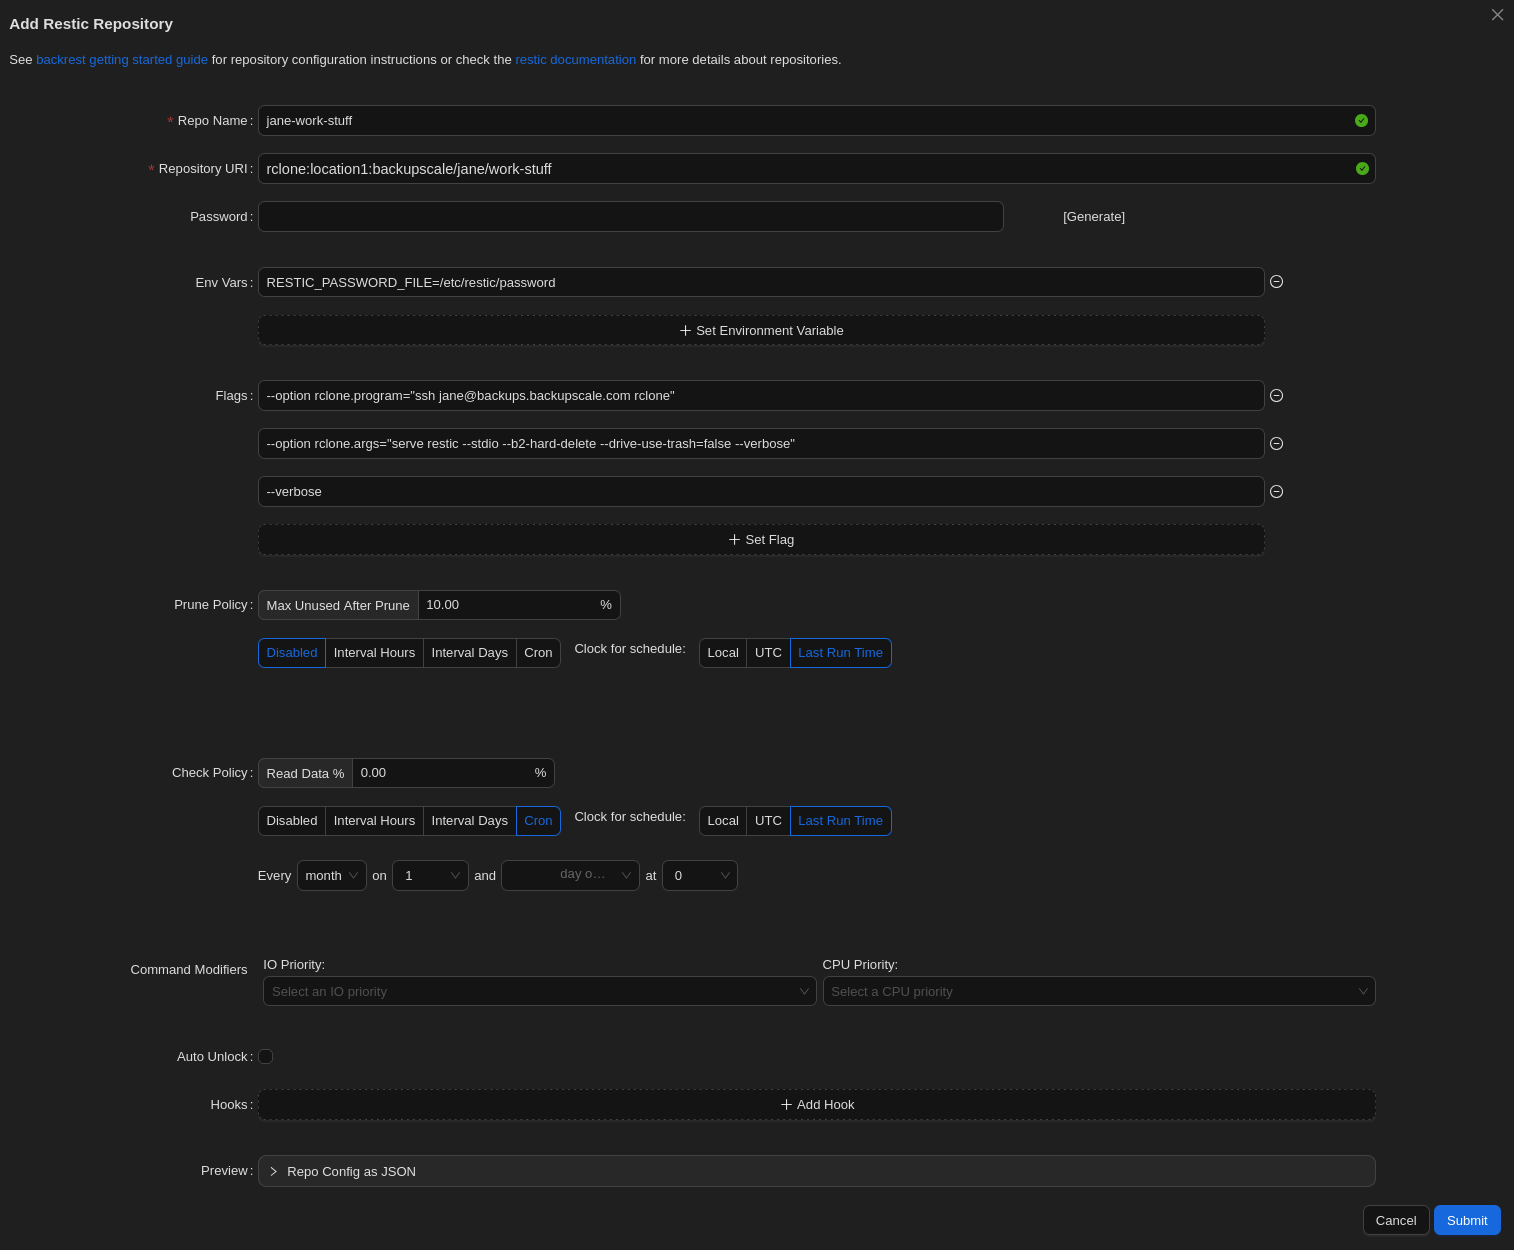
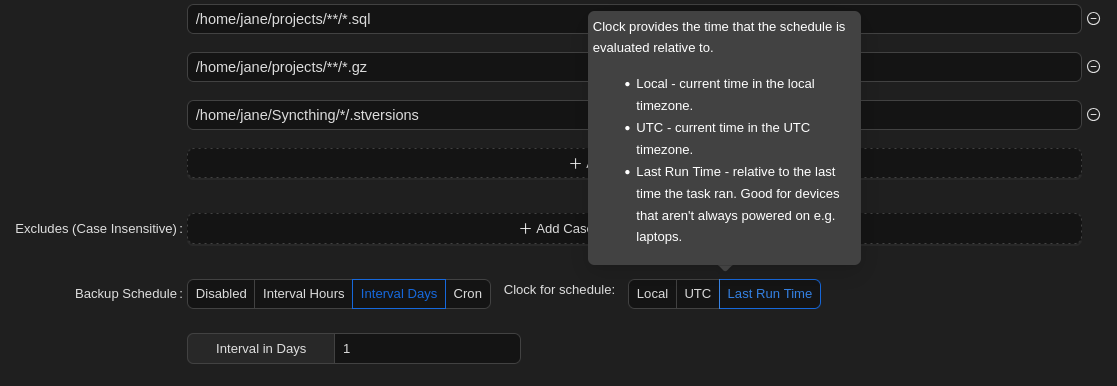
--skip-if-unchangedIf you’re backing up lots of data (either lots of files and/or big files), it may take a while for your backup task to complete. After your first backup, however, there will be fewer changes to upload so backup operations will be quicker.