Subsections of Ongoing Operations
Removing Snapshots
Background
Over time, backup repositories can become large. Because backup space isn’t free, and unnecessarily large repositories can become unwieldy, it’s important to remove snapshots to prevent this from happening.
From the Restic documentation:
This can be done either manually (by specifying a snapshot ID to remove) or by using a policy that describes which snapshots to forget. For all remove operations, two commands need to be called in sequence:
forgetto remove snapshots, andpruneto remove the remaining data that was referenced only by the removed snapshots. The latter can be automated with the--pruneoption offorget, which runspruneautomatically if any snapshots were actually removed.
Note
Pruning snapshots can be a time-consuming process, depending on the number of snapshots and data to process. During a prune operation, the repository is locked and backups cannot be completed. Please plan your pruning so that there’s time to complete it and it doesn’t interfere with regular backup runs.
Constraints
Because BackUpScale prioritizes security, repositories generally operate in append-only mode (backup snapshots can be written, but repository data cannot be deleted), these operations cannot typically be run on their own.
The high-level process is thus:
- Disable append-only mode.
- Remove snapshots.
- Re-enable append-only mode.
Warning
Do not forget to re-enable append-only mode. Doing so will make your backup repositories vulnerable to ransomware attacks: If any of your devices become compromised, attackers can delete all of your backups from those devices. Keep these maintenance windows as short as possible.
Info
While in the early discussion stages, we’re planning to add a per-key overrides feature that will allow specific keys to force append-only mode or not. This will allow you to maintain a device in a more secure environment whose key will allow it to automatically run these maintenance operations without manual intervention. While this strategy still has its risks, it provides another option.
Process
Disable append-only mode
- Log in to the dashboard site.
- Navigate to your account settings.
- Check the Disable append-only mode? box.
- Save your settings.
- Wait several minutes for your account to be updated.
- You should receive an e-mail reminding you that append-only mode is disabled.
Remove snapshots
- Log into the Backrest console from your device (http://localhost:9898/ if local).
- From the left sidebar, navigate to Repositories -> your repository.
- Hit the Run Command button.
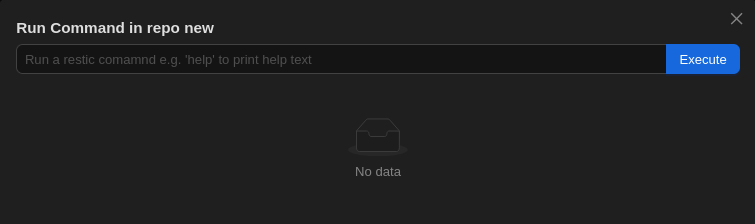
- Run a command like the following example to enforce your chosen retention policy (see the Restic documentation for details on how to modify for your requirements). Snapshots that aren’t retained will be deleted.
forget --dry-run --keep-within 1m --keep-within-daily 7d --keep-within-weekly 1m --keep-within-monthly 1y --keep-within-yearly 75y --prune
Note
This command won’t actually delete any data because of the --dry-run option. When you’re satisfied with what it would do, you can rerun that command without that option, which will actually mark the data for deletion, and then delete it (because of --prune).
- Hit the Index Snapshots button to notify the Backrest console about your changes.
Re-enable append-only mode
- Log in to the dashboard site.
- Navigate to your account settings.
- Uncheck the Disable append-only mode? box.
- Save your settings.
- Wait several minutes for your account to be updated.
- You can then delete the reminder e-mail from your inbox!
Restoring from Backups
- Log into the Backrest console from your device (http://localhost:9898/ if local).
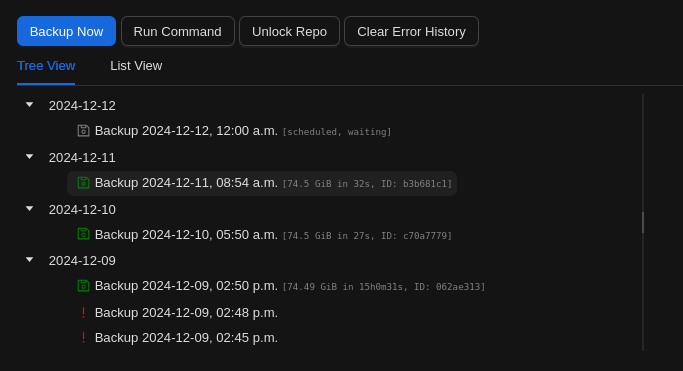
- From the left sidebar, navigate to Plans -> your plan.
- Under the Tree View of snapshots, select an appropriate backup to restore from, and click on it.
Tip
Try to think of the most recent time before your file or folder was corrupted or missing. If you realize afterwards that you were incorrect, try an earlier one.
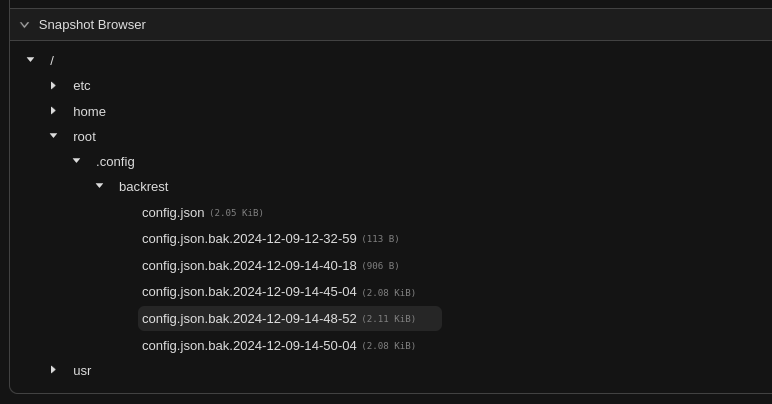
- In the right-side pane, click on Snapshot Browser, which will show the file tree.
- Click on the arrow to the left of the displayed directory/folder to expand it, and then keep doing so down the tree until you find the item you’d like to restore.
- Hover over it, all way to the right, until you’re over the little menu icon.
- You should then see a menu with options Info and Restore to path.
- Click on Restore to path. You should then see the following pop-up.

- Enter the path where you’d like the item restored. The original location should be the default, you can enter another location, or you can leave the field blank to place it in your Downloads folder.
Caution
The item being restored will overwrite whatever you have in the chosen location with the same name. If you’d like to keep that copy, place the item elsewhere.
- Review the item locally. If it doesn’t contain what you want, try again with another snapshot that will likely contain what you’re looking for.